Corrugated Roof

Definition of Corrugated Roofs
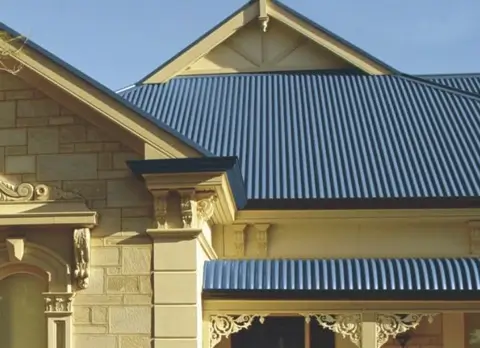
Corrugated roof is a roofing profile when it comes to galvanized color roofing. Their design in a way similar to a “wave-like” structure. They offer an alternative design to roofing when compared to rib-type and tile span profiles. One of the notable feature it has is its durability.
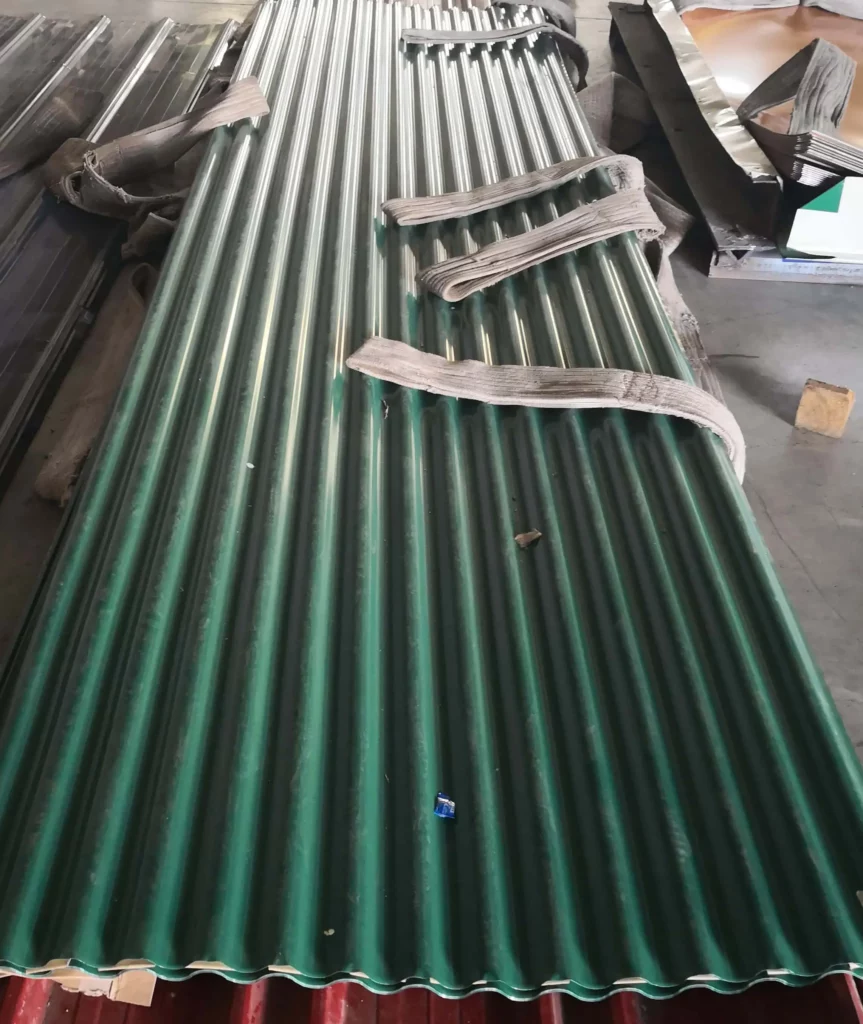
The formation of multiple grooves and ridges from the metal panel leads to increased strength of this design. Moreover because of its characteristics, they add an extra protection agains the elements of weather.
Prices of Corrugated Roofs in the Philippines
The cost of our corrugated roofs are as follows: 0.4 mm (Gauge 27) is ₱120 per foot, 0.5 mm(Gauge 25) is ₱150 per foot and 0.6 mm(Gauge 24) is ₱180 (Gauge 24). We also give various discounts depending on the size of the project. For the full details of the price of yero, you can refer to the link.
Different Kinds of Corrugated Roofs
Depending on the roofing supplier, the manner on how they are bended differs with each other. Unlike the rib-type and tile spans, this design has little room for the variation of its appearances. Picking out the right kind of corrugated roof greatly depends on the aesthetic preference of the decision maker. The color also varies depending on the roofing supplier. On our roofing product catalog, we have two notable designs of corrugated roofs which can have several colors to pick from.
Corrugated Roof Specifications
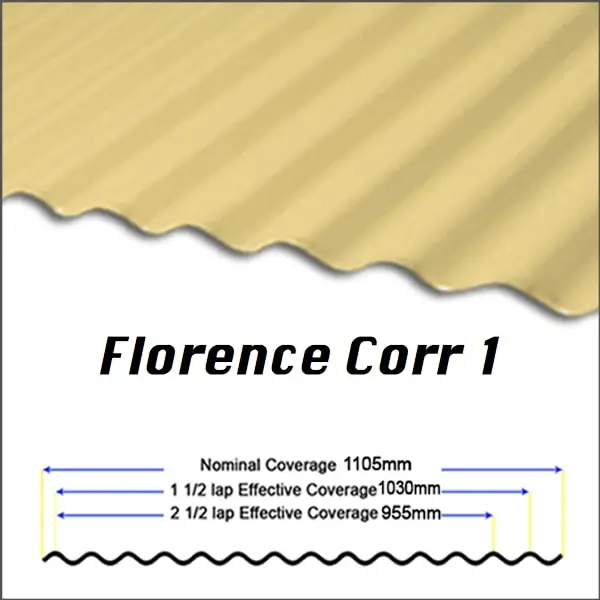
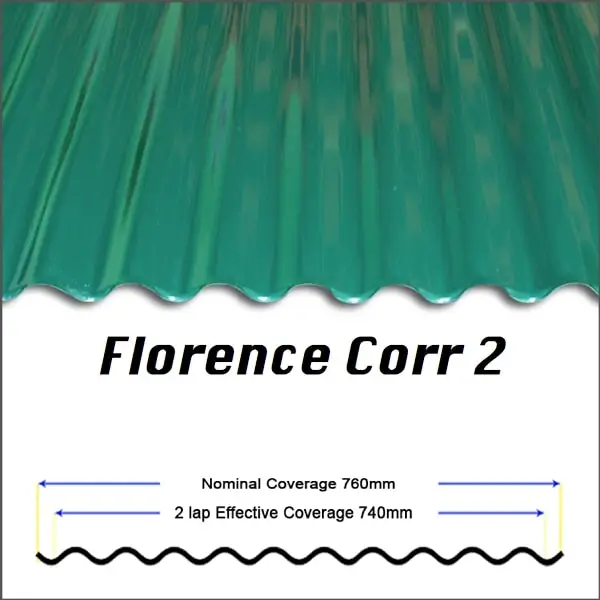
On our product listing, there are various kinds of corrugated roofs. Below are some of the types we manufacture. The primary difference between the two are their effective widths. With respect to our product lines, Florence 1 has an effective coverage of 955 millimeters while Florence 2 has an effective coverage of only 760 millimeters.
Advantages of Corrugated Roofs
Durability
Because of their design, they are the most durable across the 3 common profiles of metal roofing. The short surface area of this design results to a more stronger property. With the same concept of a cardboard box, the paper is bent to form multiple grooves. This increases the overall durability of the paper. The same is true when bending metal panels to achieve a similar result.
Ease of Installation
Just like rib type roofs, they are fairly easy to install. Ensuring that the “waves” are perfectly aligned together is the essential part during installation. Moreover, roofing suppliers provides panels according to the length of the structure. This is what we refer to as “cut-to-size” yero. This minimizes any further cutting done by a roofer when the materials arrived at the site.
Disadvantages of Corrugated Roofs
Shorter Widths
One disadvantage of this profile is its shorter width when compared to rib type roofs. The average effective width of rib type is at least 1 meter. However because of the way on how they are bended, some corrugated roof designs can be less than 1 meter. Because of this, more roofing panels are required to cover an area. This might lead to higher cost for the roofing project.
Traditional Design
One major disadvantage in this design is its appearances. There is this notion of having a traditional or old look when using this profile. However, not all are discouraged by the aesthetic features of this material. In fact, they are highly favored by a niche market. This is true for schools and residential structures around rural areas.
Where to Buy Corrugated Roofs in the Philippines?
They are commonly sold in roofing or hardware stores with a pre-defined length. The usual lengths are 8-feet, 10-feet and 12-feet. However, these are “pre-cut” roofing materials and for large projects we do not recommend buying them. Instead we suggest contacting a roofing supplier to measure the exact length of the structure. This method results to roofing panels having a cut-to-size measurement.
Steps in Installing Corrugated Roofs
Step 1: Safety Measure and Tool Checking
Before any installation procedures can occur, it is important to be equipped with the appropriate safety gears. These includes having a safety harness, boots, hard hat and handling gloves. Moreover, one of the essentials in safety is having a lifeline. A proper installed lifeline will prevent any unfortunate accidents when the roofer falls or slips from the roof.
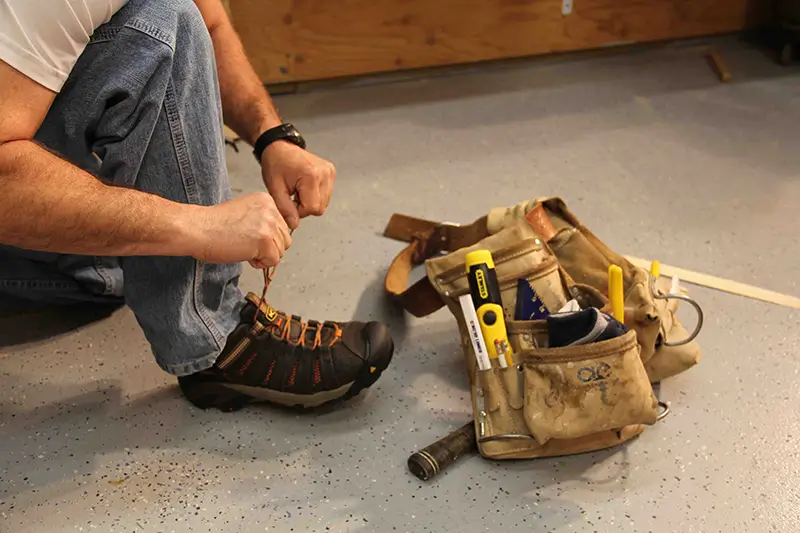
Aside from the safety gears, it is also important to check that all hardware tools required by the roofer is already with him. More importantly these are the fasteners (self-drilling screws), tin snips and the electric drill. This improves labor efficiency as it allows the continuous work of the roofer to install the panels. Lastly, a good utility belt is helpful when handling all these types of tools within the reach of the roofer.
Step 2: Measure the Length
Before any hard heavy lifting can occur on the metal panels, it is important to do a last minute check on the length. This ensures that no cutting will happen when the panels are lifted up on the structure. Not only this will improve the efficiency of the roofer but also reduce the risk of any accidents from happening. Any procedures on top of the structure should only be reserved for lapping and fastening the panels together.
Step 3: Lifting Up the Metal Panels
This step is considered to be the most tedious and dangerous across all the procedures. This mainly involves transporting the panels on the roofing system. Moreover, this procedure is highly dependent on the site structure. The more storeys a house has the more tedious the job will be. Lifting the panels can be done in different ways.
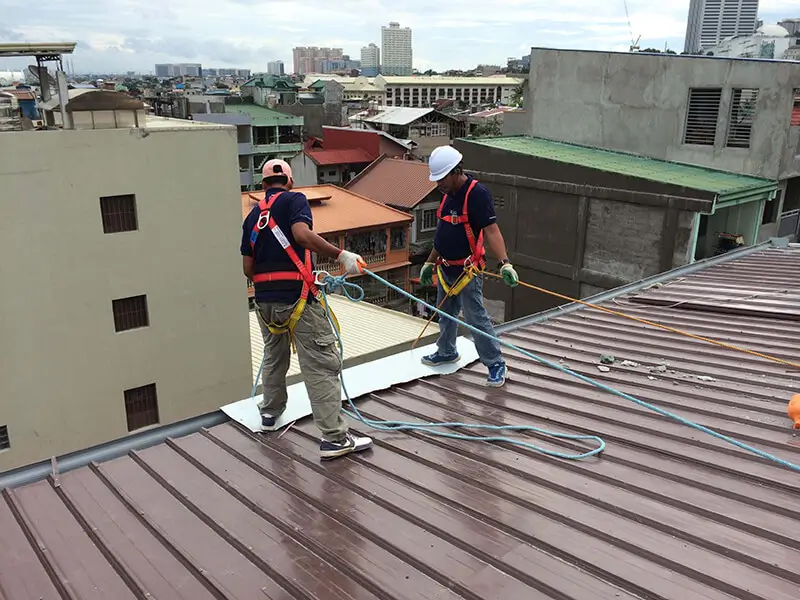
For residential projects, a ladder or a rope will do the job. For big industrial projects, a crane may be required to lift the roofing materials. Lastly, a ground personnel is required to guide the roofer pulling at the other end. Furthermore, this personnel is also responsible for preventing any bystanders from walking near the site during this delicate process.
Step 4: Lapping
After the panels have been transferred at the top, it’s time to install the first panel. Ensure that the initial panel is placed near the edge of the structure. Afterwards, fasten it through the use of a self-drilling screws (Refer to Step 5). Depending on the roofer, they might opt for a single or a double lap when connecting the two panels altogether. Personally we advise in applying a double lap for the extra protection against water leaks.

Step 5: Fastening
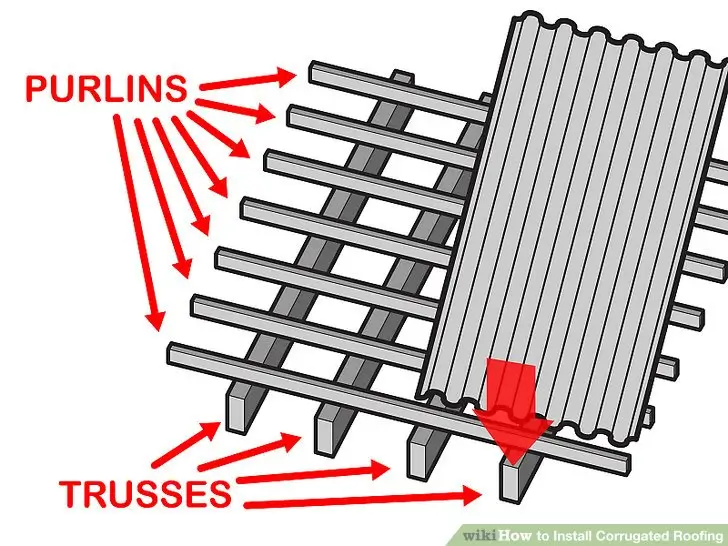
Through the use of self-drilling screws, the components are fastened together. The screws must be placed on top of the “wave” and must penetrate the purlins. For overlapping layers ensure that the two panels are aligned before fastening. It is also advisable to run the screws vertically. One important note is not to over-tighten the fastener to the metal sheets. These can result into having the rubber washer to break which can lead to water leaks. To finish the roofing system, do step 4 and 5 repeatedly until the designated area is covered.